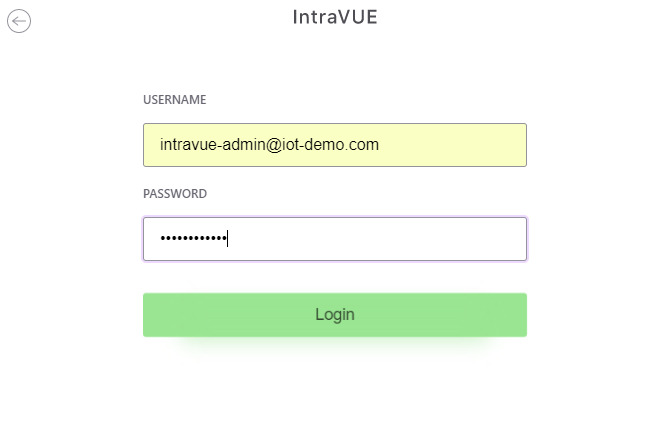
Configure Menu - Advanced Tab
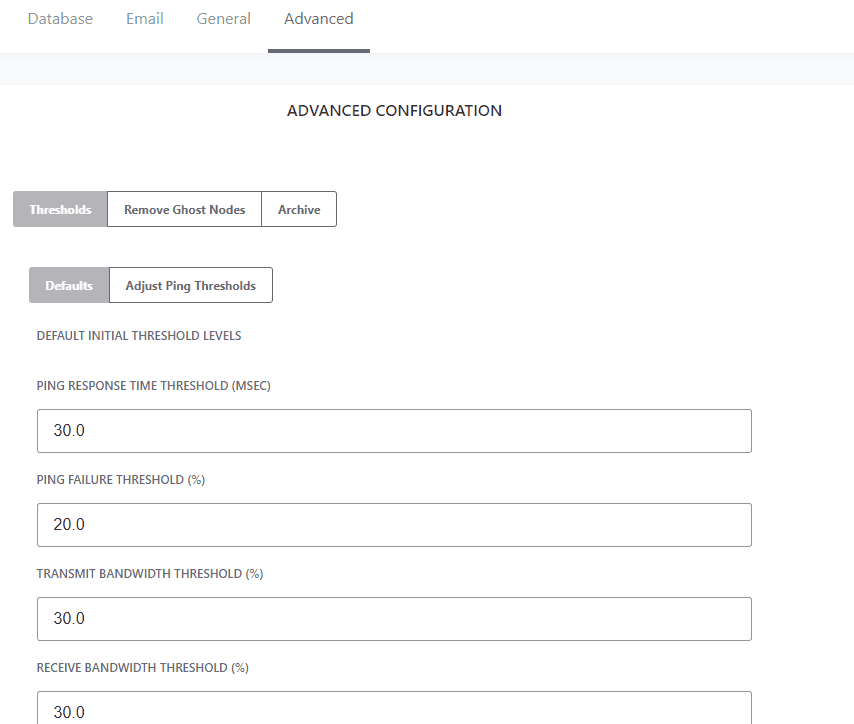
The default threshold values for all links are below. We recommend you check with the automation equipment manufacturer about what is the recommend threshold setting for their network interface. These are the most commonly used values in industrial automation environments.
Transmitted Bandwidth Threshold (30%) - Maximum percentage of available bandwidth used for transmitting.
Received Bandwidth Threshold (30%) - Maximum percent of available bandwidth used for receiving.
Ping Response Time (30 msec) - Maximum response time to a ping request from the IntraVUE™ host to the device.
Ping Failure Threshold (20%) - Minimum percentage of failed pings in a one-minute period.
See IntraVUE Diagnostics & IntraVUE Analytics to learn the more about the effects of exceeding these values.
Many links might simply have long response times (e.g. Wi-Fi, RF, unintelligent or old devices, poor cabling) and this will create a lot of "Ping Response Threshold Exceeded" events even when the device at the end of the other side of the link would still be functioning normally.
IntraVUE™ allows you to automatically increase the ping response time threshold value for all links that have exceeded their ping respond threshold setting in the last 2 hours. When you click "Adjust" IntraVUE™ will set the new default ping response time threshold value to be 10 msec above their highest ping response time threshold value in the last 2 hours.
Once IntraVUE™ has automatically increased the default ping response time threshold for all affected links a "Request Successful" message will appear on this page. Additionally, you can go to the Events tab and look for a message similar to "auto-adjusted ping threshold for device x.x.x.x to 870 msec" where x.x.x.x is the IP address of the device which ping response time threshold was automatically increased.
This feature allows you to remove all ghost nodes at once without having to delete each ghost node individually. Simply go to the Configure menu > Advanced > Remove Ghost Nodes, and click "Remove Ghost Nodes". Once you get the confirmation message go back to "View" and you will notice that all ghost nodes were removed. See Admin Verification in IntraVUE 3 to learn more about why ghost nodes are created.
An IntraVUE™ administrator can set up Active Directory authentication as an additional security layer. By using Active Directory authentication, the default admin account for IntraVUE™ will be disabled. This will result in requiring all users having to log on to IntraVUE™ using an Active Directory account when they open IntraVUE™.
 Before you enable AD for IntraVUE™ work with your IT department to get the required information below:
- Active Directory URL
- UserBase
- GroupBase
- Service Account Username
- Service Account Password
- Admin Group
- Read Only Group
Active Directory Server Setup
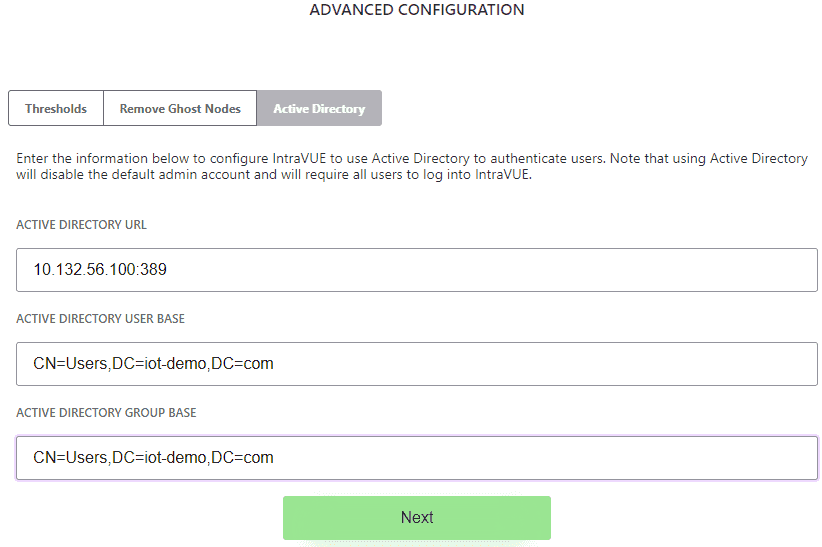
- Enter the AD Server settings. Click "Next".
- Active Directory URL: IP of the AD server
- Active Directory User Base: This is the folder location of the users in AD.
- Active Directory Group Base: This is the folder location of the groups in AD.
 Active Directory URL: This can be an AD server with authentication only, or authentication + encryption (e.g. TLS)
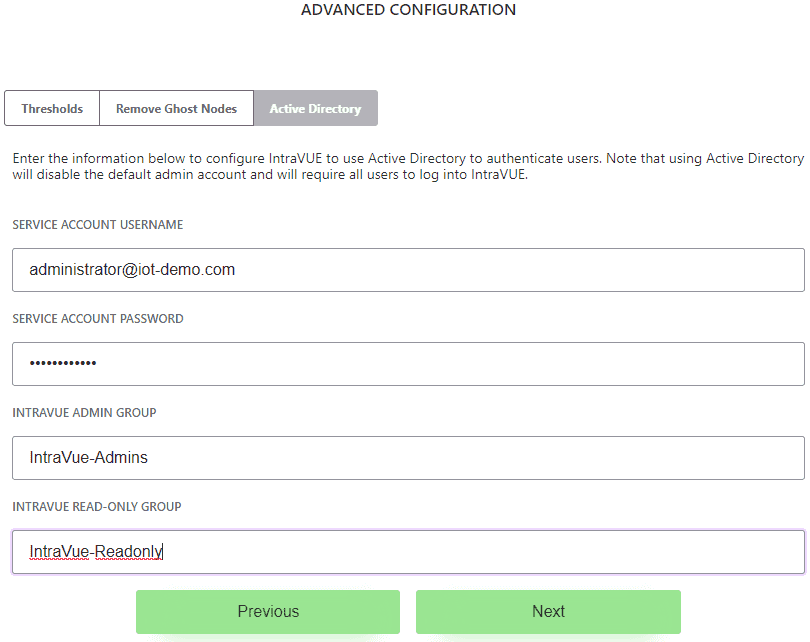
- Enter the AD credentials for IntraVUE™ to authenticate to the AD server. Click "Next".
- Service Account Username: This would be an account used to query the AD server and make sure the connection is valid, the AD configuration for IntraVUE™ is correct, and to validate the Admin and Read-only groups in AD.
- IntraVUE™ Admin and Read-Only Groups: Enter the names of the groups from AD and assign to either admin or read-only role here. These groups should have existent AD users in them before adding them here.
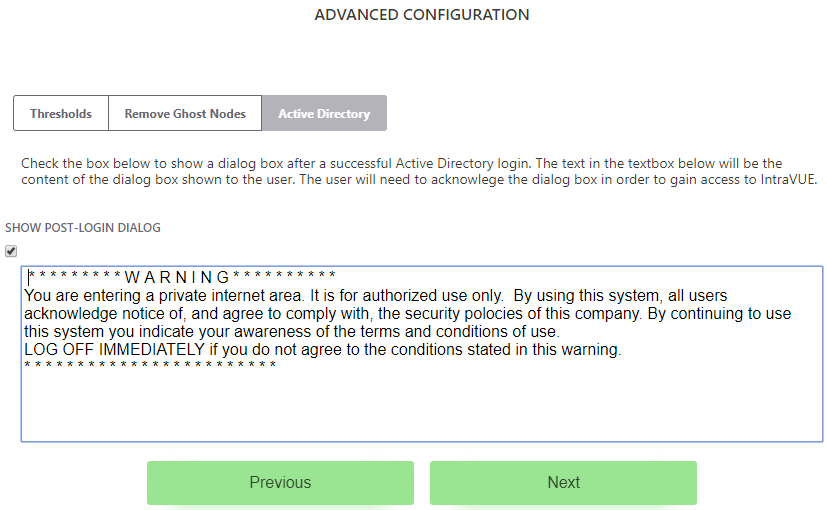
- Add a post-login banner of your choice. Click "Next".
 According to the National Consortium for the Study of Terrorism and Responses to Terrorism (START), a login banner decreases the chance of intrusion by twenty percent.
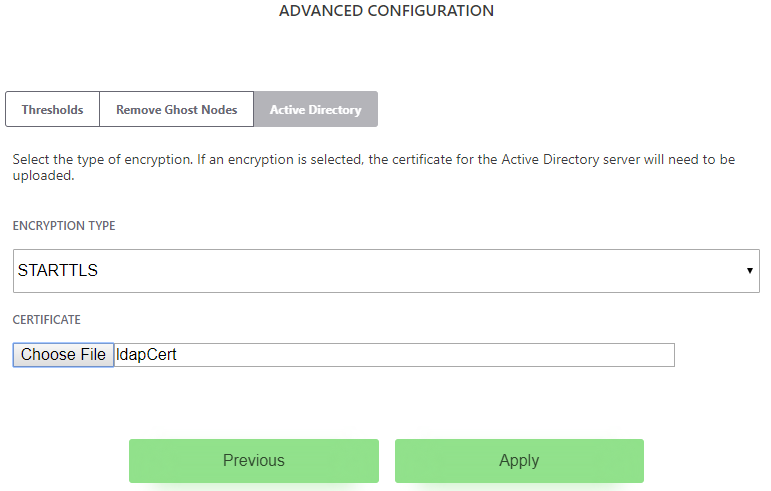
- Select an encryption type or none to simply authenticate to an AD server. Click "Apply".
- You will get a login prompt screen from this point onward everytime you try to connect to IntraVUE™
