The URL to download is as follows (please note the download is 800 MBytes in size):
http://i-vue.com/vmappliance/intravue_3.1.2a2.ova, this file creates a dynamic partition that can grow to 64GB.
http://i-vue.com/vmappliance/intravue_3.1.2a2_mini.ova, this file creates a dynamic partition that can grow to 6GB. Note: only the amount of disk used will be allocated.
The OVA file has been confirmed to install correctly in the following
Deployment on other versions of VMWare host or other hypervisors should be possible but will not be described here
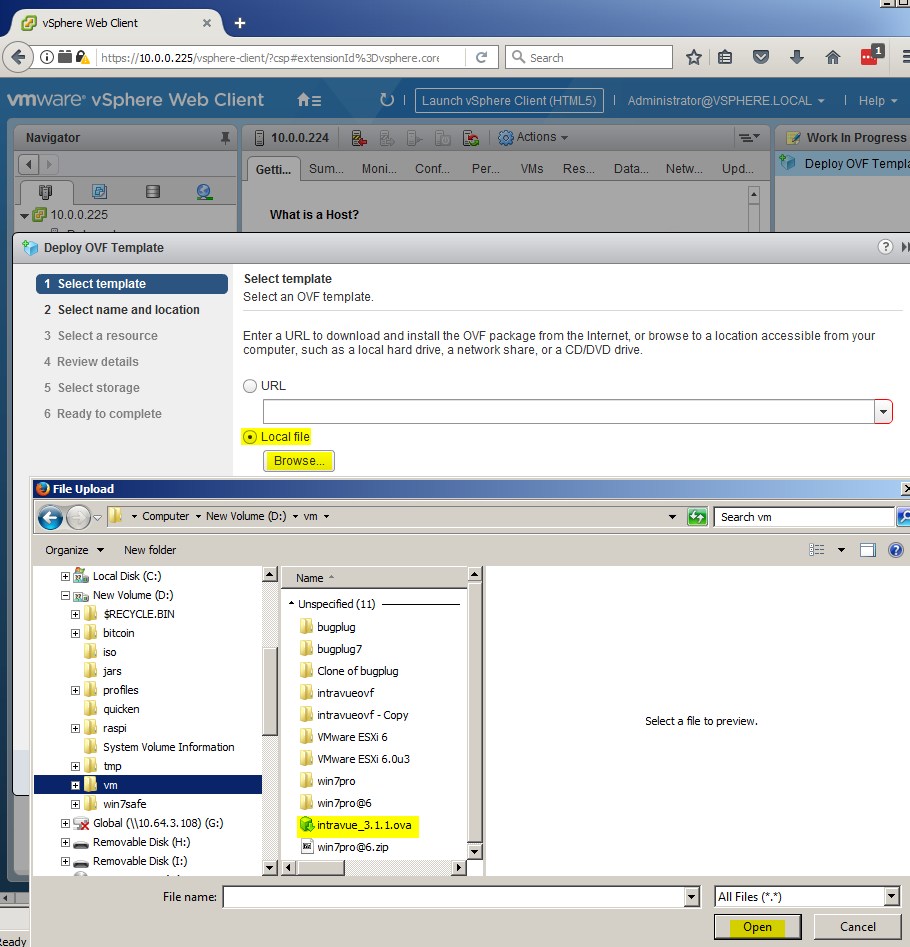
To deploy on VSphere using VCenter Server (assuming ova downloaded to d:/vm/intravue_3.1.1.ova)
launch vsphere web client flex version
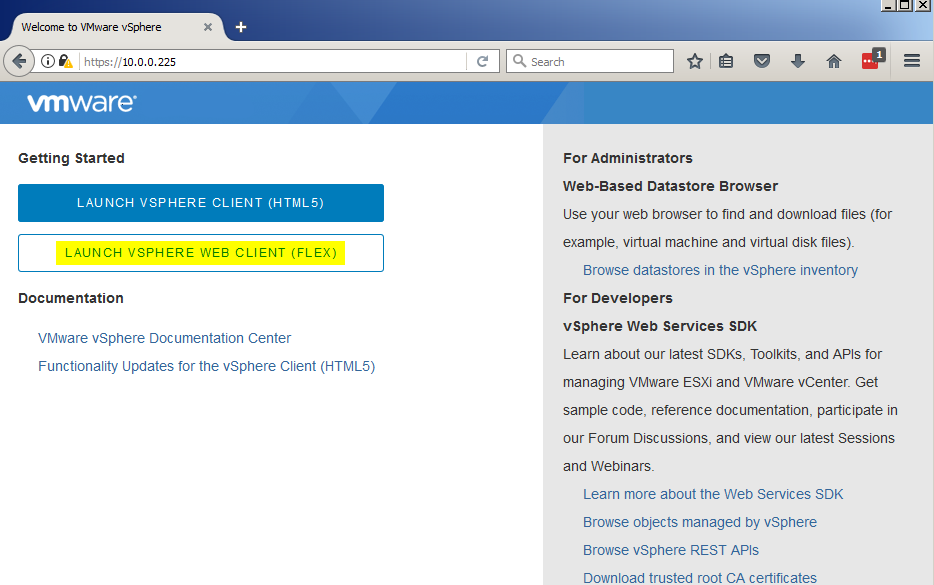
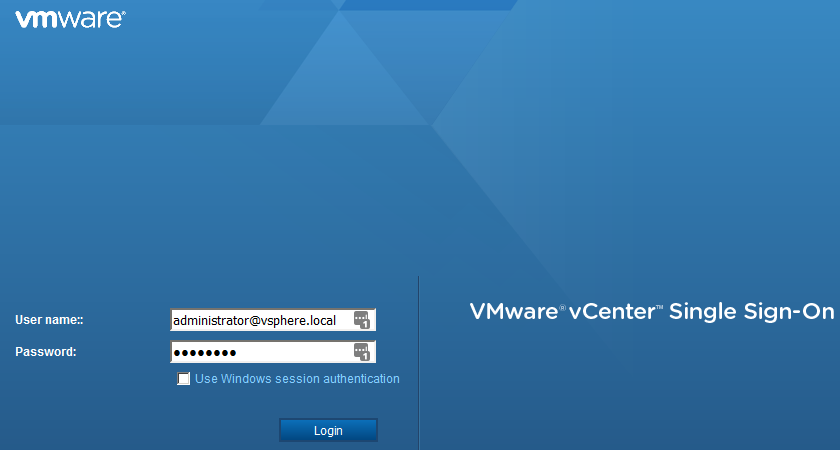
It will show a login screen
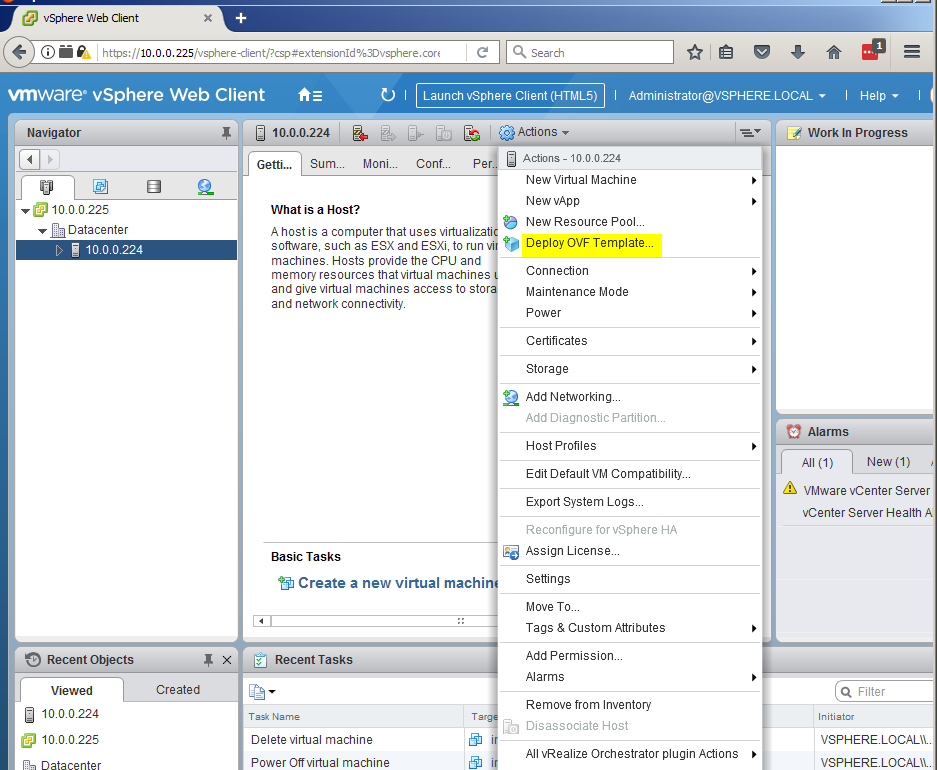
select host
actions : deploy ovf template
select template: local file : d:/vm/intravue_3.1.1.ova
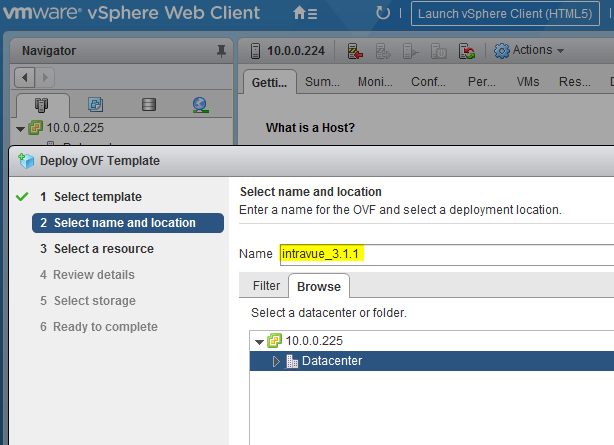
select name and location:
name: intravue_3.1.1
location: Datacenter
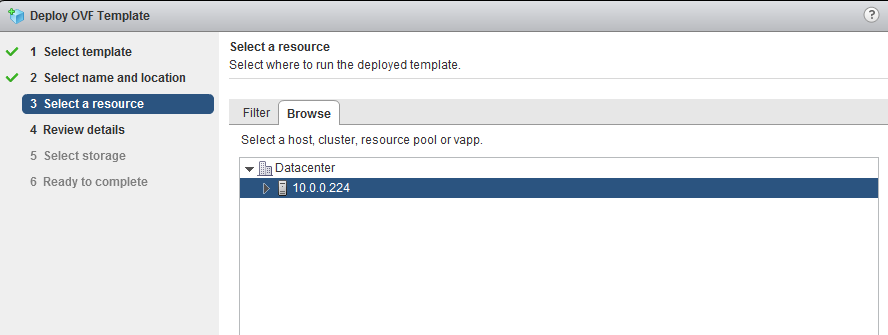
select resource:
review details: no certificate (ignore)
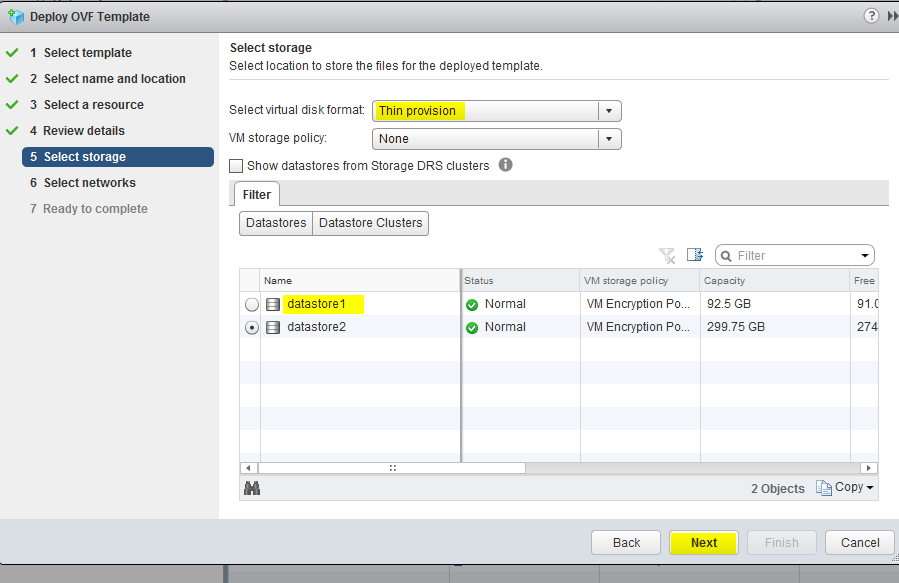
select storage:
virtual disk format: thin provision
storage: datastore1
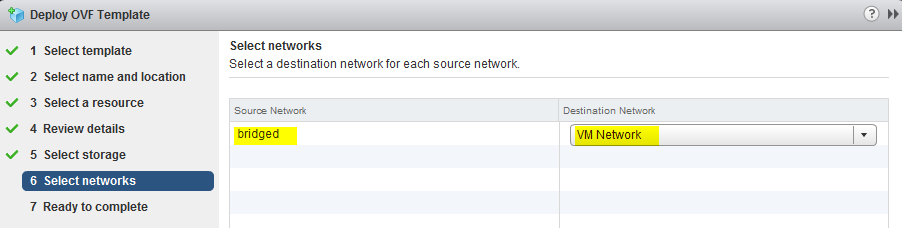
select networks: 'bridged' => VM Network
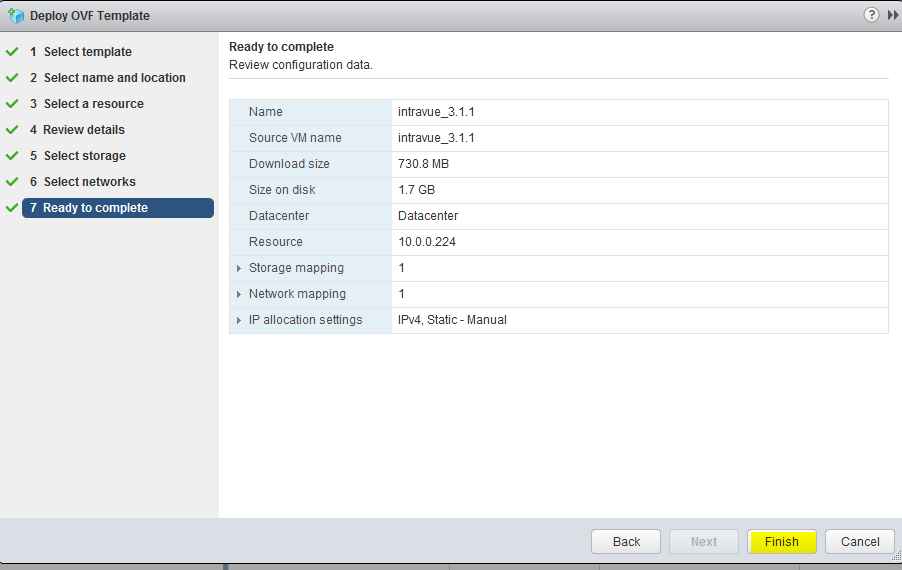
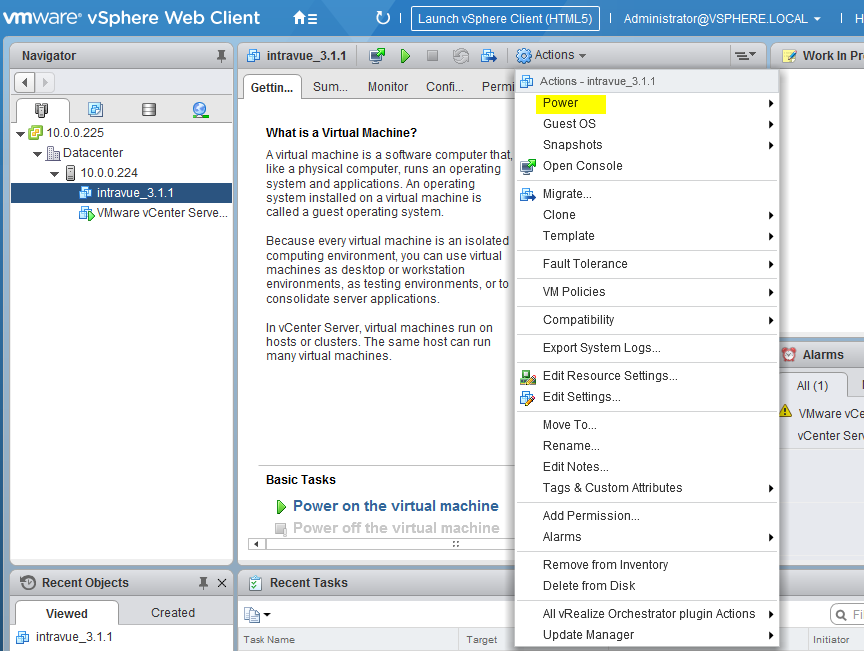
After the import completes, you can 'Power On' the VM
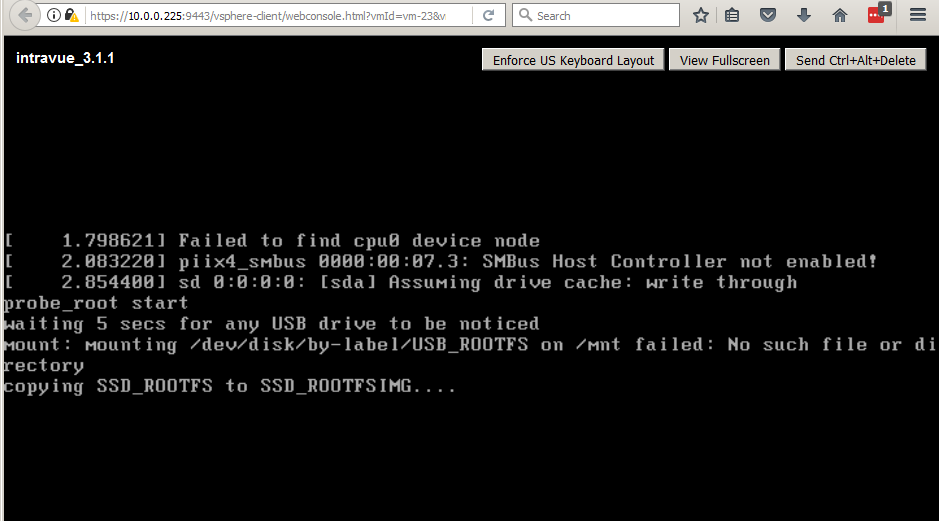
If you are watching the console, you will see the standard linux startup messages scroll through.
Note that the first time the VM is started, there will be a delay prior to boot while a copy is being made of the working partition. This is done in order to support subsequent online updates of the Appliance.
It should complete with a login prompt.
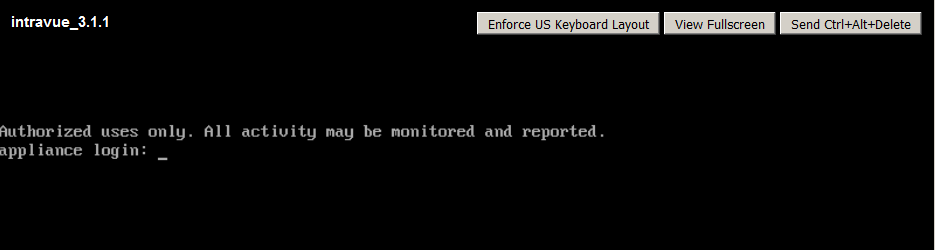
At this point all software should be running, and the unit will have attempted to obtain its IP address using DHCP
If you do not know what IP address it has allocated. you can use the 'Plug Discovery Tool' to find it. This is a small Java program which uses broadcast messages to find the identity of and change the IP settings for any Intravue Plug or Appliance units (and the VM looks just like an Appliance.)
The discovery tool can be downloaded from the following URL
http://i-vue.com/applianceupdate/index.html
Specifically select the 'uploader only' version which is a small zip file containing the Plug Configurator (Discovery Tool) and the Appliance Uploader utilities
Extract the zip file into a suitable directory and double-click the agentconfig_all.jar file
Normally, the discovery tool will use broadcast messages on the local subnet to find and list any Intravue Plug or Appliance units
Note that the image as published expects to use DHCP to allocate an IP address. If there is no DHCP server, then obviously the attempt to get an IP address will be unsuccessful
The simplest way to set a static IP address is to use the Discovery Tool.
If the computer running the tool is on the same subnet as the VM, the discovery tool should show a line with the current IP address, like the following
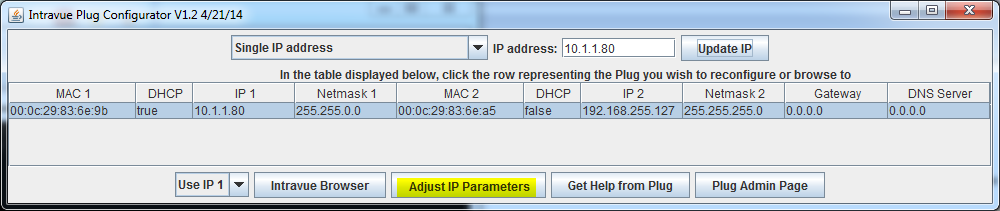
Click on the line and select "Adjust IP Parameters"
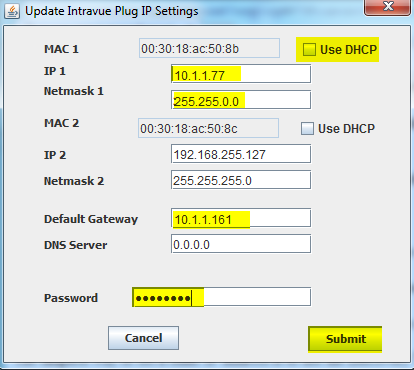
Uncheck DHCP for IP1, set the desired IP and netmask, and gateway and DNS server. Set the password to "intravue". Press "Submit"
A message will appear indicating the Appliance will reboot to accept the change, that that you should expect the line in the Discovery Tool to disappear. It will take 30 seconds or so before the line reappears.
Once the IP address has been determined / set, you should be able to browse to the Intravue graphic on port 8765
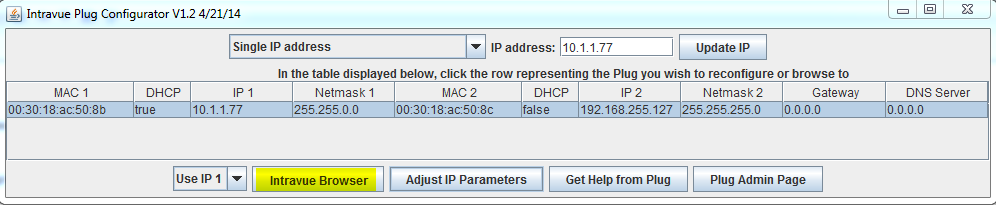
You can browse manually instead. eg if the IP address is 10.1.1.80 use
http://10.1.1.80:8765/
The graphic will show a standard 'Registration not valid' warning, and you will need to assign the registration prior to attempting to scan.

The software uses a license check algorithm which involves a KeyCode only known at installation time, so it is not possible to pre-register the software before delivery.
The process for registering the software is described in the following link
http://intravue.net/documents/ProcessForSoftwareLicense.pdf
For further assistance, please contact Tech Support