A. Swales 3/3/17
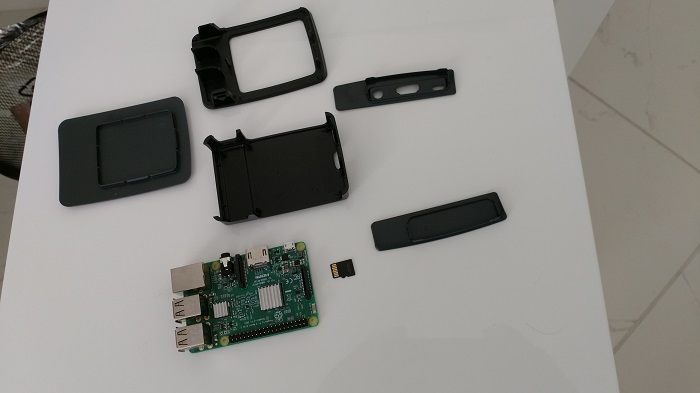
The needed components are
Raspberry Pi Model 3 motherboard
Raspberry Pi official case (black/gray)
Raspberry Pi heatsinks
Raspberry Pi 2.4Amp power supply
16GByte Class 10 MicroSD card eg Sandisk Ultra
USB Ethernet adapter (optional - to provide second LAN port)
Also in order to program the software image onto the microSD card, you may need a USB to microsd adapter
The components can be readily obtained from Amazon in the US.
CanaKit Raspberry Pi 3 with 2.5A Micro USB Power Supply (UL Listed)
https://www.amazon.com/gp/product/B01C6FFNY4
(this bundle also includes the power supply and heatsinks)
Official Raspberry Pi 3 Case - Black/Grey
https://www.amazon.com/gp/product/B01F1PSFY6
SanDisk Ultra 16GB Ultra Micro SDHC UHS-I/Class 10 Card with Adapter (SDSQUNC-016G-GN6MA)
https://www.amazon.com/gp/product/B010Q57SEE
Belkin USB 2.0 Ethernet Adapter
https://www.amazon.com/gp/product/B00E9655LU
Transcend USB 3.0 SDHC / SDXC / microSDHC / SDXC Card Reader, TS-RDF5W (White)
https://www.amazon.com/dp/B00FJRS8F8
In the case of devices for the UK/EMEA, you need to use a different power supply. All components can be ordered from Amazon UK as follows
Motherboard
https://www.amazon.co.uk/Raspberry-Model-Quad-Core-Motherboard/dp/B01CD5VC92
Power adapter
Case
https://www.amazon.co.uk/Raspberry-Pi-Case-Black-Grey/dp/B01F1PSFY6
Heat sink kit
https://www.amazon.co.uk/dp/B01N6P3J7X
Microsd
https://www.amazon.co.uk/SanDisk-Ultra-MicroSDXC-Memory-Adapter/dp/B013UDL5V6
Ethernet adapter
Microsd adapter
https://www.amazon.co.uk/Transcend-MicroSD-USB-Card-Reader/dp/B00FJRS8F8
7-Zip File Manager
http://www.7-zip.org/a/7z1604-x64.exe
Win32 Disk Imager
https://sourceforge.net/projects/win32diskimager/files/latest/download
Low cost agent image file
http://i-vue.com/miniagent/ivagent_pi.img.gz
Intravue Plug configurator
http://i-vue.com/miniagent/agentconfig_all.jar
The image file is provided on the web site as a compressed disk image with a size of around 700 Mbytes. It will expand into a raw image of 8000 Mbytes and this is what is written to the microsd. (A 16GB card is used, the unused storage helps to increase the lifetime of the card)
To program the image on Windows (64 bit), 2 free utility programs are used
7-Zip File Manager
http://www.7-zip.org/a/7z1604-x64.exe
Win32 Disk Imager
https://sourceforge.net/projects/win32diskimager/files/latest/download
Download the file from the url to a suitable directory
http://i-vue.com/miniagent/ivagent_pi.img.gz
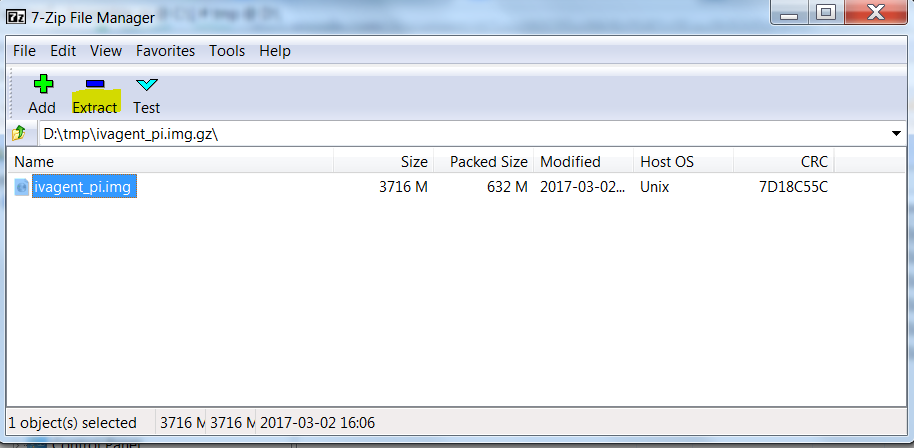
Open the image file with 7-zip file manager and select extract
This will create a file of exactly 8000 M called ivagent_pi.img
If you see the size above as 3716 M, this is not a problem - this is what you get if the 32-bit and not the 64-bit version of 7-zip is used. The file extracted will be of the correct size as you can see with the file manager
Place the microsd card in its reader, or if your computer has one, the SD card reader using an adapter.
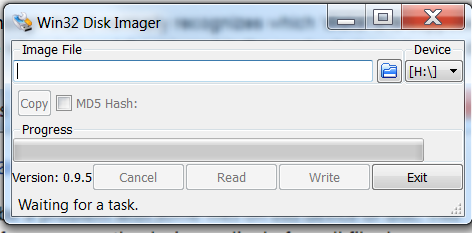
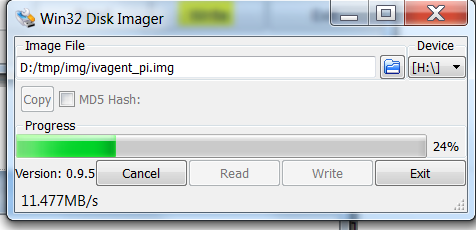
Now use the Win32 Disk Imager
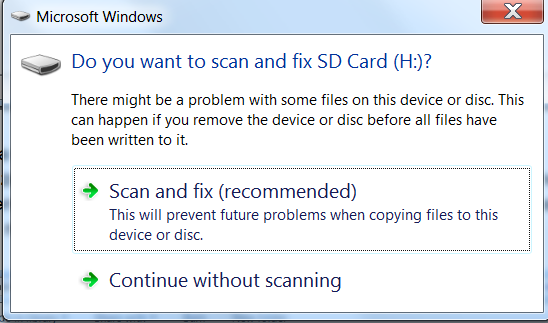
This program is smart enough that it normally recognizes which ‘disks’ it is supposed to be working with. In my case when I placed the microsd in the reader it showed up as drive H:
This is a good sign. Select ‘Continue without scanning’
Notice the dropdown box only gives you a choice of one drive (in my case H:). You need to make sure though that this is the right one since writing over the wrong disk can have very painful consequences!
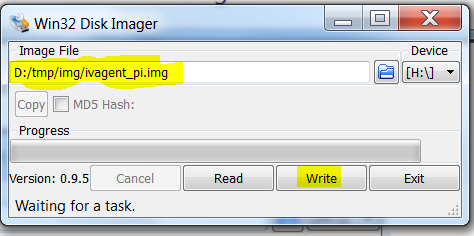
Browse to the correct image file and click ‘Write’
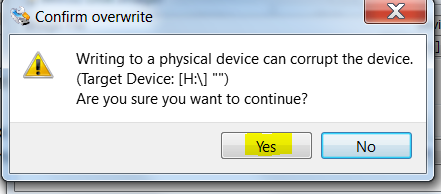
Accept the warning
The operation will take about 10 minutes
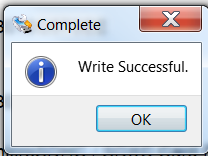
When complete, quit the Win32 Disk Imager and remove the microSD card
First snap open the case. The 2 top covers and the 2 side covers will pop off.
Inside the case you should find 4 adhesive feet which should be applied to the bottom of the base.
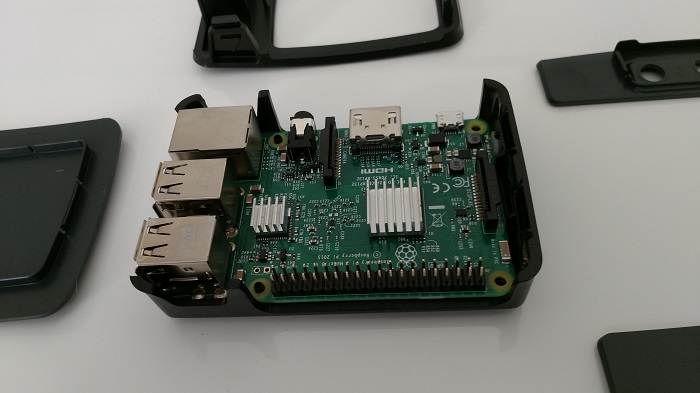
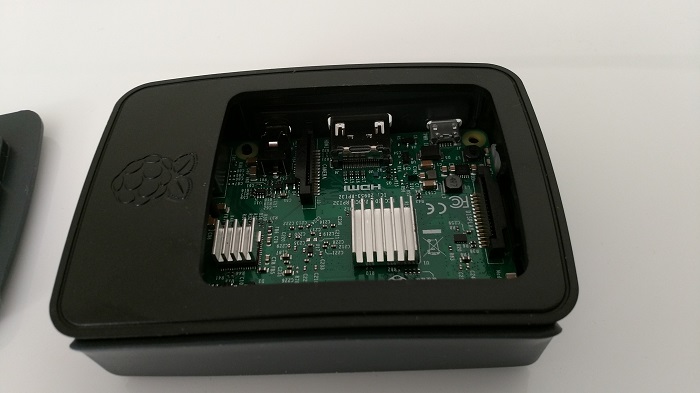
Apply heatsinks on top of the CPU and I/O chip as shown in the image
Now place the motherboard in the base. It will only go one way.
Snap on the two side panels. The one with the holes goes over the connectors
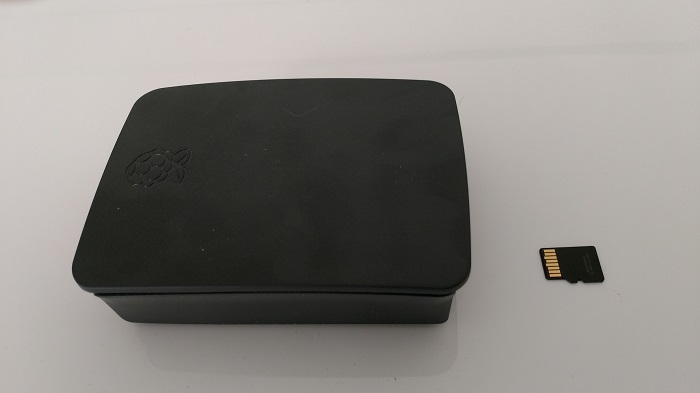
Now snap on the innedr top cover as shown
And the outer top cover
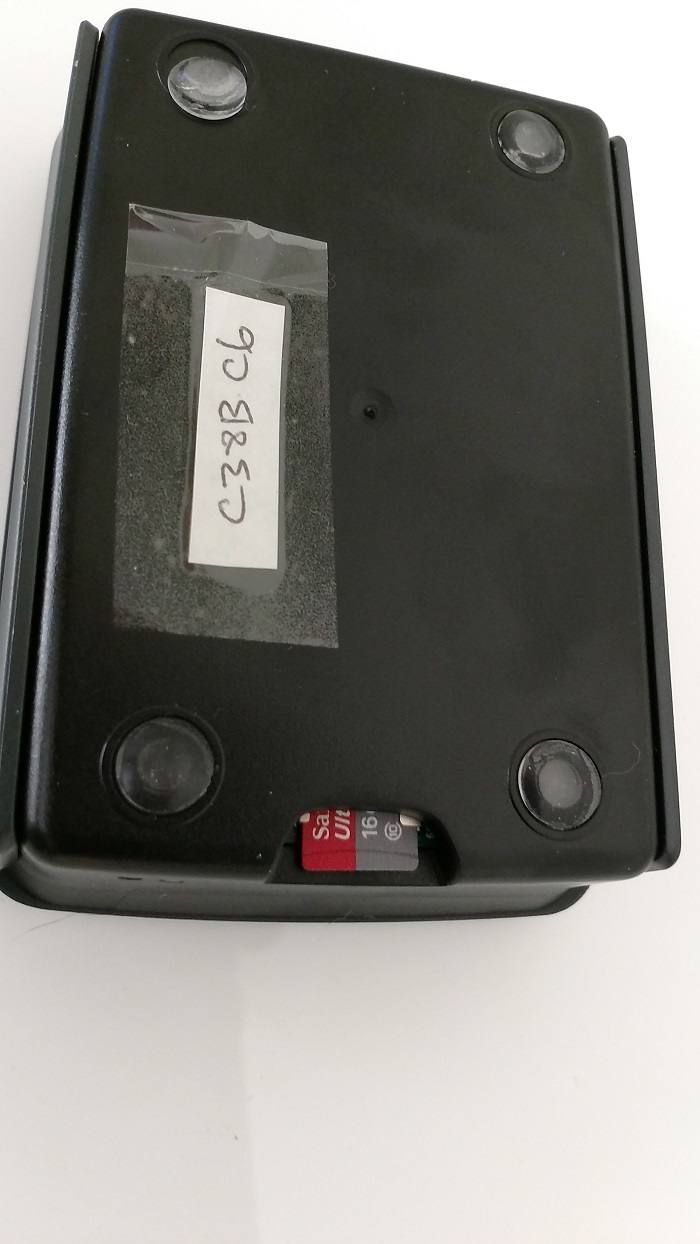
Next place the microSD card in the socket underneath the unit as shown. Note that it will be ‘upside down’.
You can verify the unit is functional by connecting it to a network with a computer running the ‘Intravue Plug Configurator’ (ivagent_all.jar).
This is a Java program, so the computer needs to have Java installed. This would be the case if the computer has previously had Intravue installed or has been used to browse to an Intravue display.
You will need to use a modern version of this program - versions prior to Dec 2016 have some limitations that may make discovery difficult, if the devices had been previously configured with an IP address in the wrong subnet.
The program needs to be run from a WIRED network, not a wireless one. Some wireless adapters interfere with the transmission of broadcast messages which is what the program uses to perform its discovery.
The latest version of software (2.4.1a9) allows for discovery even in cases where a DHCP interface is used and there is no DHCP server on the network
Start the Plug Configurator by double-clicking the ivagent_all.jar file
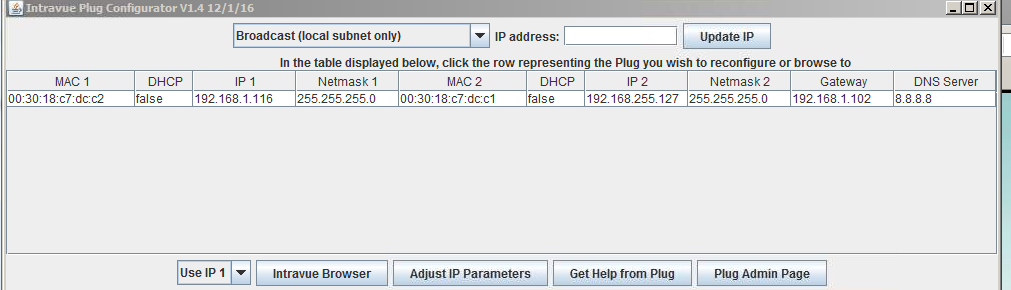
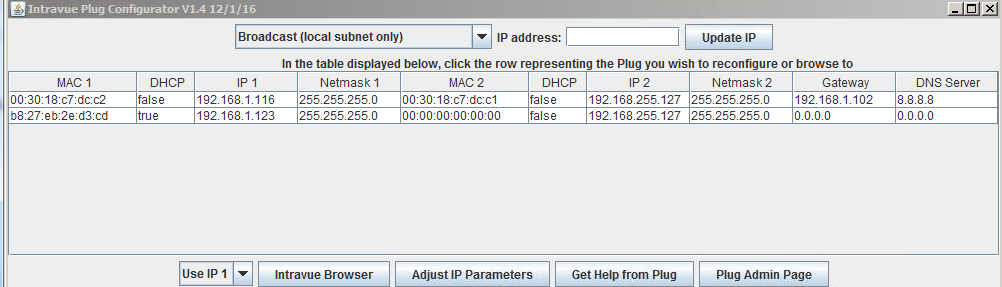
Any existing Intravue Appliances on the local network will be found (in my case, I have 1 unit already, at 192.168.1.116)
Connect up the new Raspberry Pi unit, with its recently-burned microsd card, to the network, and plug in the power adapter. You should see immediately that a red ‘power’ light comes on at one end of the box, and on the Ethernet connector there should be a pair of flashing lights to indicate that traffic is being seen.
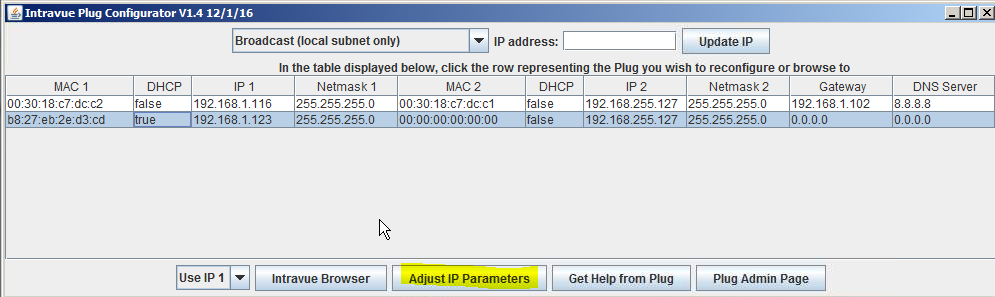
Within a couple of minutes (less if there is a DHCP server on the network) the display on te Plug Configurator will show the new unit
If there IS a DHCP server, you will see a display showing the DHCP address. If there is NO DHCP server, you will see an address show up as 0.0.0.0 in the IP1 field.
To set the desired IP address, click the row of the spreadsheet and click ‘Adjust IP parameters’
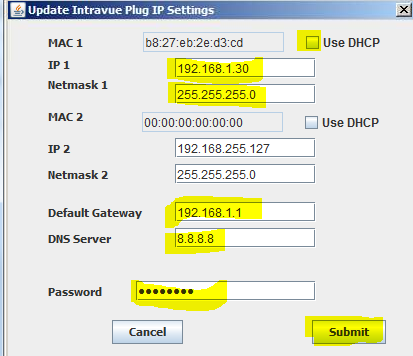
Uncheck the ‘Use DHCP’ and set the IP, netmask, gateway and DNS to the correct values
Use password ‘intravue’. and ‘Submit’
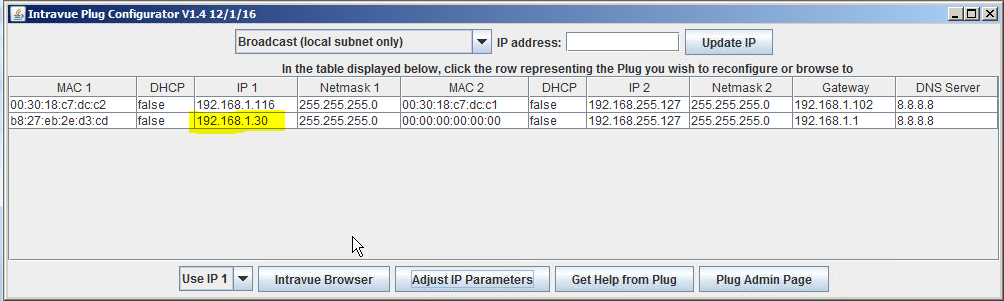
After 30 secs or so, the display should change to show the new IP address
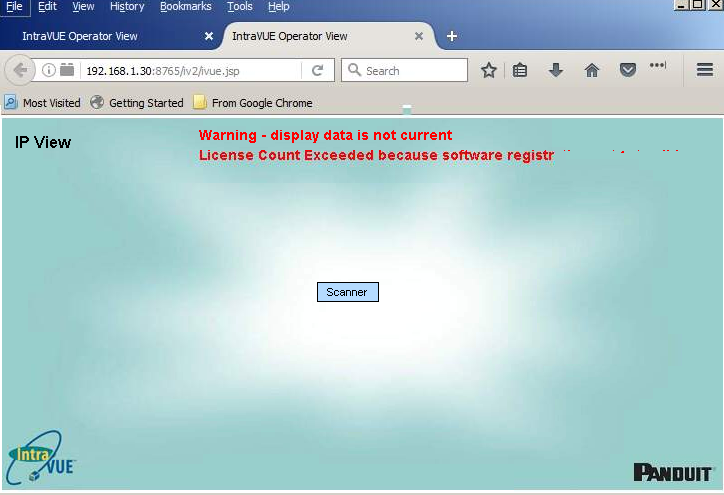
You should at this point be able to browse to the unit on either its Intravue address (port 8765) or the AutoIP address (port 9090)
eg http://192.168.1.30:8765 (and follow all the security prompts to allow Java browsing)
Success.